A Hankering for Something Pretty

It has been a longer pause than I thought for a posting. Finally, the miniature magic has returned after a break doing another interest – hand stitching.

Life can get complicated, as the present situation shows.  HOW YOU HANDLE IT is the only part you have control of — SO deep breathes and a time to find some inner calm.  Creating something by hand is always a good place to be — YOU are in charge completely and it takes your mind away from the news, etc..  It doesn’t have to be overwhelming.

How often have you said if only I had the time………

So a little mini dabbling may do you some good. I had switched to hand stitching this fall and winter for a change of pace and the ease of  stopping and starting multiple times a day.  I have longer time periods again and wanted to share a possible project to do at home.

There are 2 requirements………a good printer and fabric sheets to print on.

I have resized and tweaked colors of various Vintage Hankies in Miniature to play with on a pdf file for your use.  Enjoy! Please remember this is for your use, not for resale.

A few note for the printing……….. this is the brand I use (there are others). I leave the plastic backing on after printing to cut out the individual hankies.  It is a sharper cut with it still in place because the hanky is stiff. After I am done trimming and touching up edges THEN I remove the backing. Fabric sheets are pricey so that is why I filled your sheet so you have a bunch instead of a few per page.

fabric-for-printing
The brand I used

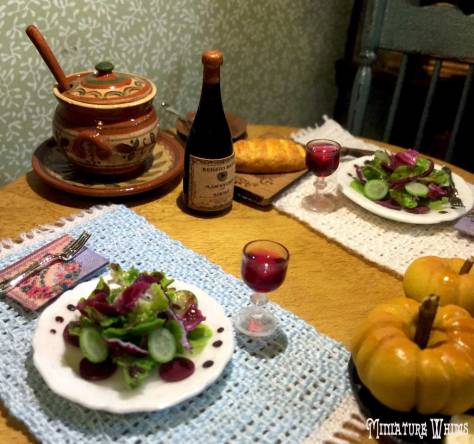
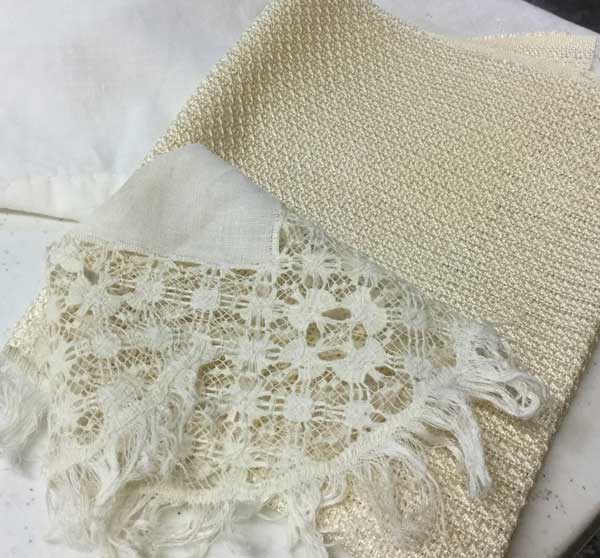
Here is a gathering of various ideas to use them………

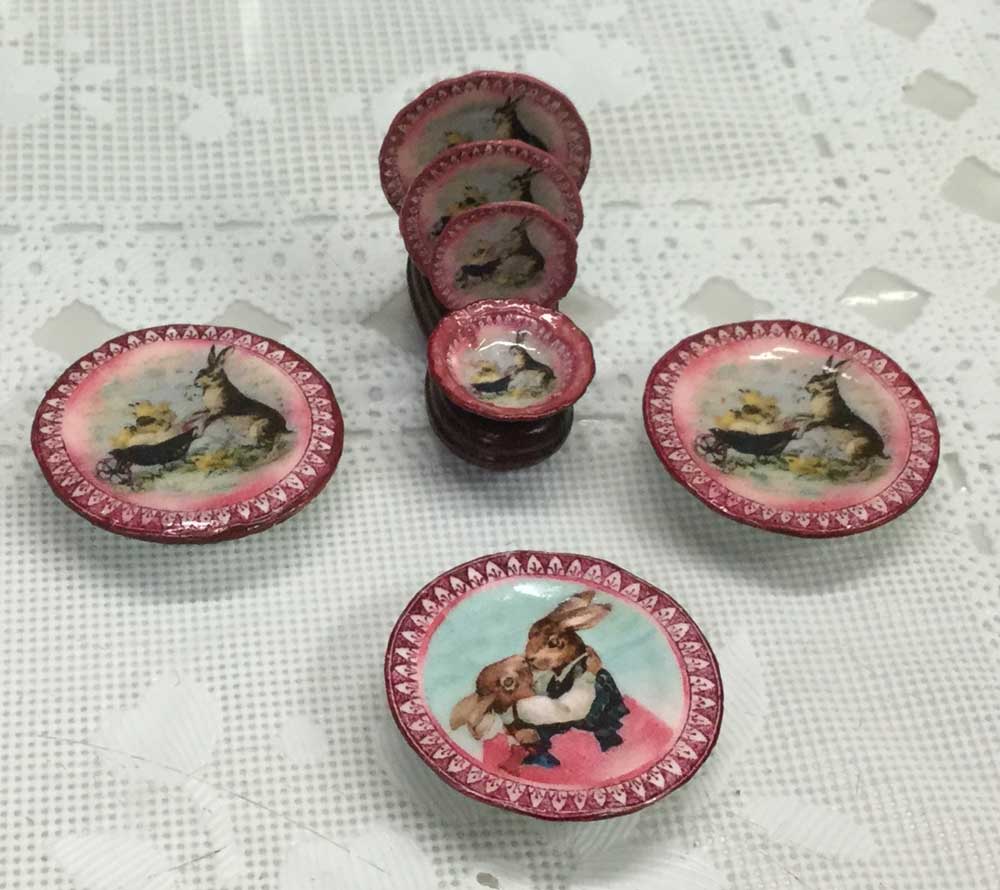
My favorite is the boxed hankies…..

boxed-hankies
A few samples of boxed hankies

Making the narrow rimmed boxes can seem hard but here are the walk thru steps of how to go about it.

Make a 1 inch square of cardstock/mat board.  I doubled it for ease of use.  The better the squaring, the better the box form as you will see. Using colored cardstock wt paper take an exacto knife to score the fold lines. You may lose a few to get the hang of controlling how deep you cut to score the lines but not cut through entirely.  Remember it is only paper so it is not a hard to come by material. Fold on the score lines.  Cut and trim to get flaps for the “box”. Glue the flaps in place. Clips are great help if you have some.

box-making
Making the box

Trim the top edge as needed.  Put a square of light color paper in the bottom.  If the flaps seem to bother you cut a skinny piece to glue over them to hide them.  Find some paper with a tiny design to cut a decorative strip for the outer rim of the box or thin washi tape if you have some. Another tip is to color the top edge with a gold stamp pad ink to get rid of the white cut edge of the strip.

fine-tuning-the-box
Embellishing the plain box
trimming-the-outer-edge
Possibilities for the outer trimming of the box
white-edge
Use a gold stamp pad to get rid of the glaring white edges

Now it is ready for the hankies!

As I mentioned earlier do not peel off the backing after printing so the hankies are stiffer for cutting out and trimming.  Use good scissors for this for the best results. After they are cut out I like to retouch up the edges with color.  Use a piece of scrap to test your markers FIRST for color and bleeding!  Also, color the edge laying flat on scrap cardstock.  You will have better control that way.

trim-hanky
Test marker on scrap and apply edging while laying flat on a surface

This shows the arranged folding for a couple of boxes.  Remember you do not want the second layer hankies to lay completely flat or you lose the look.  You make need a tiny bit of cardstock filler to get the raised effect. Trim with tiny silk ribbon bows,etc.

handky-sample-1
Example 1
prep-second-layer
Example 2 – Hanky cut in half and use a  db cardstock filler stake to keep it from appearing flat
boxed-1
Example 2- Back side of the half with cardstock stake and then trimmed
boxed-2
Example 2 – The front half piece and placement in box

Now for draping ………. I used Aleene’s Stiffen Quik. Have your hanky cut out, edges colored if desired and backing removed. Pour out a little stiffing liquid in a small bowl. Dip the hanky in it and cover complete it. Remove it and dab off the excess on a paper towel.  Now use a pincushion to drape and mold the shape you want.  I did not pin through the hanky but around and over the top of the hanky to shape it.  Let it dry and you will be amazed how cool they look when unpinned later.

aileen
The stiffening agent I used to drape the hankies
pinned
Pinned and waiting to dry

Hopefully, you will find this fun and entertaining.

Just remember to put a timer on the phone so you do not forget the pot on the stove if you get into playing around — but that is another story……..


Come with an Appetite

I have been dabbling on a side project and finally finished it, so pardon the leap to another place with this posting.  I promise to return to the Orchid Hill tour but was bursting to share my fun.  I am also posting this on a second blog – Food in Miniature.

I decided earlier this year to start the second blog dedicated just to foods due to my mini food collection.  I had noticed that several miniature food blogs that I have followed in the past have fallen to the wayside and I miss them.  So I decided I would take up the torch and continue the enthusiasm for miniature food art.  You maybe a fan of Instagram and the like but I want more than a photo and hashtag trail.  I like more information and enjoy the story, details, etc..  I am old fashioned and have always like the journey instead of jumping to the end result photo.

I haven’t added much to the food blog yet as you can see.  I had to figure out a writing style to present things – not just a picture of a great food item.  So I decided I needed a stage – hence the current project for displaying them.  Things are always simple and quick in your mind but so much more involved in actual time, add to that fact,  I work S-L-O-W.  It does work out for the best for me that way because over time I get the layered details to create the allusion of realism.

Collecting foods are fun but the REAL fun is putting them in a setting that creates a story – another layer of enjoyment of them. Hence the current project to compliment the art of realism that can be found in the miniature world of foods.

Another objective was to point out that you do not have to have a large dollhouse – a small setting can be very versatile and it is amazing how much detail you can put into it.

I wanted a kitchen and a dining area with both areas well visible but separate.  So sometimes both can be set up or just the one area depending on the occasion.

So enough introduction…….

Fine dining doesn’t have to be elaborate.  How about a beet salad with a vingerette dressing drizzled over it followed by soup and bread? Sounds perfect to me!

salad-1-lab
A beet salad with a drizzled dressing for tonight’s supper.

The colors in the salad complimented the red wine in the glasses and seems made for each other.  The salad plates are by Orsolya Skulteti of Orsis Minis.  I got them this spring at the Chicago International show but she also has an Esty site but not possible to make it to the show.  The soup tureen is by Jane Graber.  Her redwork always adds a warm touch. The pumpkin autumn tray was made by MoonBijoux , an Italian food artist on Esty.

I was going to have the room unoccupied but a Jeanne Rullie’s doll fit so well as the proud hostess that she had to stay.  She seems glancing at everything for the final check before the guest arrive.  Her hand fit the knob of the chair and added a life like gesture that I hadn’t planned on but was perfect for the moment.

dining-room-lab
The final check of the dining room before the guest arrives.


the-hostess
The soft smile of contentment when everything is ready.


the-hand-gesture
The casual hand resting on the chair was perfect.

The table and chairs are by R.L. Carlisle.  His work has stood the test of time and still look fantastic years later.  They were made in the mid 70’s.

table-shot
The table is set!

The corner hutch was a painted Bespaq hutch piece that seemed dated but liked the size and shape. So I removed the doors and revamped it to fit my era.  I am aiming for a 40-50’s setting.

It now houses some great china painted pieces that have a final home.  I also added in with some of my own faux painted Chrysnbon dishes to fill it out and add to the color palette. Nancy Wantiez made the basket and I filled it with a lush philodendron from my friend Loretta Kasza.

I was loosely aiming for the 40-50’s era so I thought a print of The Gleaners was a must.  The food bowl is by a UK artist from 25+ years ago and still holds it colors well. The urn by Vince Stapleton seemed a good choice for the time frame.  Of choice the 40s and 50s were big into doilies – so naturally I used them freely ( I don’t need much excuse – I love them anytime!).  The clock is by Ron Chase.  I never have a hard time finding a spot for one of his. I had  made the National Geography magazines for another project a few years ago and made plenty so added that and the reading glasses to set on the stack.

right-side-of-dining-rm
Creating the mood of the era.

Time to skip down to the kitchen…

I had to have an old style refrigerator.  I got brave and drilled a hole to add a light!  It was worth the effort! Not entirely sure if they were lite  back then but I am pretending so. I stocked a few items inside and even found an ice tray in my pile of metal minis.

The stove is a classic of the era.  This is a kit from Phoenix Models in the UK. You will find a finished one occasionally on Ebay but rather pricey.  The kit is a cheaper way to go but I will warn you it is not an easy build – the instructions require multiple rereads and patience to assemble.  However, the end results speak for themselves. I think I might do some photos of the constructions in a posting some time down the line when I build another one to help fellow builders.

warm-from-the-oven
Putting the oven to use!  Pot roast cooling and rolls warm from the oven.

My display in the kitchen is not in line with the upstairs dining as you can see but I was in the “cooking ” mood so allow me a little artistic license today!

The roast is out of the oven and rolls are about ready.  I got the meat fork this summer at a miniature shop during a trip.  A vintage piece from the past. It added such detail along with the crochet potholder to the scene.

The apple strudel prep board is by Betsy Niederer.  It could be sitting by itself under a dome since it creates a stand alone setting  but I put it to use in my kitchen today. I am imagining the smell of cinnamon in the kitchen mingling with the roast and fresh rolls. The meal is coming together. The cherries and peaches are by Jan Patrie.  I am not sure what the cook had intended but I loved the color – so why not!

apple-strudel-prep.jpg
Apple Strudel prep board by Betsy Niederer

I had intended to build a kitchen sink cabinet but dreaded the hinging of doors so rethought that idea.  My placement of one in the mock up is borrowed from another kitchen.  The large porcelain sink was a better fit for the time (and no hinging needed!). I will probably add a skirt to it later.

kitchen-beginnings
The kitchen mock up.
the-kitchen-sink
The porcelain sink was the final choice.

I laser etched the door window to add some interest and not the standard look.

the-door.jpg
The frosted etching adds some privacy.

Stocking the pantry was fun.  I am not sure the brands and packaging are totally accurate but I enjoyed the arranging. The unfinished cabinet is by M & R miniatures.  I painted it and added worn spots and shelf liners to give it the feel of well used kitchen storage.

pantry-open
A well stocked pantry.
back-work-area
Everything for making a fine meal.

In playing around with things, another Jeanne Rullie’s doll invited himself into the scene. It made a perfect shot with the porch light on and the door halfway open – he looked so ready to step into the kitchen.

the-visitor.jpg
He is looking forward to the evening meal invite.
at-the-door.jpg
The dinner guest and perfect gentleman.

A view of the kitchen….

kitchen-left-view-lab
Wonderful food and aroma greet the guest.
lab
The bustling activity in the kitchen.

Now so you can see the humble start of my kitchen and dining room box…..

the-beginning-structure
The beginning shell.
playing-house
Playing house with arranging things.
whole-house-lab
The final  warm and inviting home.

It has come quite a way from my bare beginnings but I have a feeling it will be hosting many a fine meal in the future.

Whether you linger in the dining room or in the kitchen, the food is ready.  It is time for a great meal and good company!

You’re invited for supper!

The Secrets Within the Walls

This could be a title for a mystery story but actually it is the reveal of construction methods of the first floor of the Orchid Hill House. Perhaps they will aide you in a dollhouse/roombox project!

If you studied the parlor and entry way pictures of the last posting you might be wondering how to do that — so here you go!

As I had mentioned the stairs had railing on both sides – this really took away the realism I was trying for in making a miniature version of a staircase. I also stated my carpentry skills are slim so this is an modification I could do with what I had.

Lastly, I am happy to note — these stairs are available on Ebay,  Mine came with the dollhouse.  Search for dollhouse staircase and you will find them in the selection. I was glad to see them there otherwise this  staircase information would be of limited use.

beginning-staircase
The original staircase with both railings

Here is mine after it is stained, inner handrail removed and spindle holes filled and attached wall.

stairs-modified
Now it is has a more elegant look

I do not have a step by step guide but pictures do tell a good share of it.

Here is the back side.  It tells you several things.  I tacked the fitted wallpapered wall to the staircase with tiny nails.  I wanted a strong connection and did not want to deal with glue and it sliding around until it set up and have glue in places I didn’t want.  The other thing is this is fabric instead of paper wallpaper.  More on that in a minute! I can not remember for sure but I think I have may started the wall curving by ironing it around an oatmeal container after the fabric was attached to gently curve it and then attached it to the staircase so it was not as big of a fight getting it to curve.  Time makes some things fuzzy.

the-back-side-of-stairs
Attaching the curving wall

Make a paper mockup of the wall to get the size.  Check it several times – the old saying measure twice and cut once really applies here!  Now use the paper pattern to cut the wall out of crescent board – illustration board – not matt board.  It is sturdier and less apt to warp ( it does a little but not as much as matt board). Below is the two I use regularly.  The thicker one is for flooring and the medium weight is for walls.

crescent-board
Available at art supplies stores or online

 Now for the reasoning behind using crescent board walls instead of just wallpapering the existing walls.  First – it is SO MUCH EASIER to wallpaper on a flat surface than to fit your body in odd angles to get the wallpaper attached in such tight quarters as a dollhouse.  Second – you can have wider options on wallpaper choices!  It doesn’t always have to be paper!  Fabric is an option – sounds odd but it is a good one but it is not glued – now I have you attention – use the iron without steam and fusible craft interfacing to attach it.

interfacing.jpg
the interfacing I used.  I did not wash the fabric.

With this project I needed the wallpaper to flow from the upstairs hallway, down the stairs into the entry way.  My fabric wallpaper allowed a change to the bolder William Morris print in the rest of the entry way.  The entry hall paper coordinates with the parlor paper (another William Morris print).  In a miniature project you are seeing all the areas at the same time so it needs to be a smoother transition versus real life when you walk from one room to another area.

the-blend.jpg
The colors and patterns that worked together

Third – it hides the wiring.  Walls are smooth without areas being lumpy due to wires or tape underneath.  That is all on the back side of the papered crescent board.

NOTE:   these are construction methods picked up in classes taken a long time ago with Brooke Tucker and Ray Whitledge.  Neither are teaching anymore and these are good design techniques that need to be passed along and not lost!

The use of crescent board for walls expands your options on adding interesting features in your rooms so I heartily recommend try it out sometime! Examples in this project is the curved wall of the staircase and the built in bookcases and window seat.

Now back to the construction……….the floor has to in place before the stairs goes in NOT afterwards.  Make note of that!

wall-1
Wall in place
wall-2
No supports yet, so it is floppy

The wall is in place but needs supports so wood “beams” are glued on the back and make a firm fit at the ceiling and the floor to anchor it down. Stairs are glued to floor.

wall-3
Needs a firm ending beam here
wall-4
added three or so beams around the curve

I added a another wall that butted up against this wall to create a little nook that tucks into the corner of the dollhouse. I curved it slightly but the baseboard joining is masked by the floor urn since it wasn’t a perfect match to the curve. I covered the wall joining with some wood trim.

nook-by-stairs
A nook for a small floral accent.

The key is to have supports to keep the walls braced and stay in place.

Now for another trick… this is my ceiling for the entry hall.  It is merely a embossed foil wrapping paper painted.  It was available at TJ Maxx and seems to appear in varied colors around the holidays. It may or not be there but keep an eye out for wrapping papers as an option for inexpensive textured ceiling paper. I used tube paint and liquin to color it but probably could use regular acrylic paints also.

ceiling
transforming the gift wrap into a textured ceiling

My front door visible in the very back is a little bit of a cheat but may be of use to you.  In this dollhouse, the back in not visible – just ugly with wires and window openings that are crudely cut.  So I reversed the door so the pretty exterior trim is now my interior trim.  Now it you are a purest or want to see both sides this won’t work for you but I thought you like to know that trick.  I also changed the arch trim to match my big windows in the parlor windows.

the-entry-door
The exterior view on the left vs the the usual interior on the right.

Now for the arch way……….

I used an arch way available from Lawbre.  It starts out white and you can paint it to suit your tastes.  It fit a 1/2 in thick wall.  The wall can be solid wood OR something else.  I used Gator Board – this is different from foam board.  It is stronger and does not warp.  This is the material Rik Pierce used for his structures.  It is lightweight and you can carve a tunnel in it to tuck wiring in.

carving-a-tunnel-for-wiring.jpg
Gator board with a tunnel carved out for wiring
the-hidden-tunnel
The yellow line shows the path of my hidden wiring.
smooth-wall
A smooth wall with no wiring lumps in the wallpaper.
the-white-begining
The beginning pieces
wall-bits
Painting really transformed the arch pieces!
the-parlor-entry
The painted archway that makes a statement!

Here is the beginning of dreaming of the window seat area………the start but no clue how to implement at the time.

Details later…………out of time today!

the-beginning-dream

Enjoy the secrets the walls reveal and possibly incorporate some techniques to translate that dream in your head to your dollhouse!

A Snail’s Pace

Sometimes things can take a really, really long time — a snail’s pace.  My Orchid Hill House project is an example.  I have worked on and off on it for many years.  Each year it is on the list to finish it but  some aspect would seem overwhelming and progress stalled out for a time.

I do believe the snail may actually be crossing the finishing line!

This project was my first project to electrify a multi-room dollhouse.  Roomboxes have been my comfort zone for electrifying, so this has been a learning process.  I have gained confidence now that all the lights are on and working!

entire-house-without--people-2
The finished structure!

Since it is a multi-room structure the furnishings, wallpaper, and  flooring has to play well together.  The coloring and style has to draw the eye smoothly from room to room.  Dollhouses have to account for the fact that you are visually seeing all the rooms at the same time.  In real life, your eyes only have to take in the details of one room at a time as you walk through them.  Due to the my very slow work pace, I really thought through my choices instead of haphazardly making decisions just to complete it.

original-structure
The original dollhouse design – note the stairs double railing.

I am a bit perverse and decided to make the open back the front since I don’t have the space for viewing both sides.  I decided early on that it is my dollhouse, so my rules.

the-new-back-web72
The original front is the NEW back.

We all have our methods – for me it is a bit like childhood playtime – arranging and rearranging furniture pieces until I like the view and the purpose of each of the rooms take hold.

I did make structural changes to the rooms to make them work better for my final arrangements.  I increased the window size in the drawing room  to accommodate having built in bookcases and a window seat. Also, an enlarged archway to move from the entry area into the drawing room.  The bedroom window was deleted to make room for a cozy fireplace.  The window on the 2nd floor landing was enlarged to make a more interesting area instead of just a pass through spot of a stairway.  The staircase was also modified from the original.  Okay, it may seem like a lot but it was a process that I gave heavy thought to before each modification.

To have stairs or not was not a quick decision.  Stairs can add to the realism of a dollhouse but can also take up a large foot print that limits the detail that you can put in the structure.  So it is a balancing act.  The stairs going from the main floor to the 2nd floor was enough for me.  The top floor layout was hindered by stairs so they were left out for a better room arrangement. This house came with stairs but having a railing on BOTH sides of the stairs really narrowed its appearance. I knew something was bugging my eye appeal but I wasn’t really seeing it until one side of the railing fell off in the handling of the stairs in my many room rearranging.  Ummm….  I can’t widen the stairs to the base with this set of stairs BUT I could curve the wall to match the inner curve of the stairs – much better!

I could live with that!  I filled in the railing holes with wood putty and covering the stairs with a carpet runner to hide the changes. As you guessed, figuring out a way to curve the stairway wall and its supports lead to another really long pause until I had some firm thoughts on how to do it.  I did figure it out and you would think clear sailing but no, I would just see somethings else that I just couldn’t easily do and wander off to a different project to satisfy the creative whim until my enthusiasm returned.

If I wandered through all the individual decisions this could be become a very long posting and put you to sleep.  SO enough of the details this time and some photos that explore the first floor. More about the construction later but time for some eye candy now!

This slideshow requires JavaScript.

The parlor details…..

the-parlor-entry
A warm and inviting parlor.
comformable-chair
A comfortable chair by the fire is never a bad idea.
left-of-fireplace
Rich details to add to the character of the room.
right-of-fireplace
A warm fire and sweet songs of canaries draws the guests in.
chair-and-decatour
Another chair that draws the eye with its elegance.

I will end with my favorite spot.  The window seat with built in bookcases for the quiet escape into the pages of a book.

best-spot-in-the-house
 A cozy place to read!

Hopefully, the photos tweak your interest and want to come back for more about Orchid Hill House.  Until the next posting…………

Bunnies and more bunnies

Last year I worked on an Easter themed roombox but it did not get totally DONE until about a month past Easter. Needless to say it didn’t seem timely to share it then in the blog so late BUT I can now (and would appear ahead of time if I hadn’t filled you in)!

I love spring with the changing of the dab browns of winter into green.   Nature’s wake up call!  So Easter themed sweets with bunnies and pastels was always on the list. This is a photo of a setup a few years ago with a couple of the baskets that now reside in the roombox.  The doll is by Loretta Kasza and the dog by Leslie Frick.

girl-w-basket-2
A vignette for Spring in 2017

For me, what color to build around is the biggest hurdle to begin a project. This time a glance at a pile of odds and ends was the catalyst. A leftover piece of soft yellow tile drew my eye.  There was enough for the flooring. Yipee!  Digging around in the scrapbook papers (this isn’t a large room) lead to a coordinating diamond pattern that would work with it.   My photo isn’t translating the nice colors but they are soft and pastel.

color-beginnings
The color scheme beginning

My box itself was a small shop kit with a top opening.  I wanted the inside to be more accessible and visible so the front facade with paned window and a door was changed to a glass front but kept the side window.  I wanted a hint of a shop but not the reality.

original-front
Original front
front-viewl
A glass front allowed better visibility of my Easter treats
box-side
A hint of a shop
embellishmwnt
Metal finding added some interesting detail

I had a wall shelving unit from Reutter Porzellan.  I have used them before and like the flexible shelving and the mirrored center.  It fit the box perfectly and the back wall of the shelves pops out (I think it is so you can change out the wallpaper if it is not to your liking).  I just left them off so my room wallpaper was the background for it. I picked up the soft tan brown tone from the wallpaper to paint the shelving. I was on a roll and added pastel polka dot paper to the doors and painted the trim framing a robin egg blue.

shelving-before
Original Shelving
shelving-transformed
Repainted and tweaked
left-side-bunny
Doors further embellished

I have had the Peter Rabbit  figure for a really long time.  He wasn’t expensive ( I got a couple – a good thing -I have never seen them for sell again ).  I really thought I would have used him somewhere before now but they never worked into a scene until now. He is the perfect ambassador for presenting a tray of Easter cookies!

bunny-in-hand
An ornament of some kind?
bunny-ambassadors
Care to try a nibble of my cookies?

The little vagabond rabbit vignette is another treasure that never looked right for a scene until now! It looks like it was specifically made for this room.  It even  inspired me to try to make one, so the chicks and umbrella vignette sits beside it.

diarama
Chicks and bunnies abound

Of course, an offering of cake is always welcome.  The egg braid cake is by Ann Caesar. A couple from the counter includes a rich chocolate cake by Betty Accola and a decorative feast by Ruth Stewart.

egg-bread
A Easter tradition in miniature
cakes
Not your average cakes!

I will admit some of the fillers come from my Easter line from my website.  I do better when I have a need or purpose in mind when creating products.  So at times there is an overlap.  I try not to do it too often or this blog just becomes a long advertisement.  The taller cabinet is a kit and the cookies are made from my cookie shapers. I wanted more foods and cookie trays were the ticket.  I enjoyed the cookie making adventure so I made plenty!

The counter top displays an abundance of bunny themed sweets.  The basket on the far end is by Betinha Murta.  I brought it last year at Chicago International even though I really didn’t need another filler but it was so cute! Therefore it had to have a spot on the counter top.

basket-1
Betinha Murta’s Easter basket
counter-bunnies
My bunny shaped candy boxes

Not all the details are expensive – just keep your mind open to the possibilities.  The bunny “nest” is from a package of scrapbooking embellishments with a revamped miniature use.  Possibly could be used again for a Christmas, Halloween, or other holiday treat???   With grandchildren now, the tiny rubber animals found in the bins near the plastic toy animal figurines hold an interest.  That is where the bunny in the basket came from. Here he is surrounded by his friends awaiting a possible toy shop or children’s nursery setting.  They were all around a $1 each.

origins-1
The bunny “nest”
origins-2
Bunny and pals

The main counter and its side companion were fun to fill with cookies and other goodies. I painted them the same robin egg color to coordinate well together.

plexiglass-counters
Bunnies and more bunnies
main-counter-view
I did like making cookie trays as you can see.

I have pulled out the bits and pieces that make up the shop to show the detail because it is FULL and too overwhelming in a flat photo.

I may have to truly take a head count of the bunnies in the roombox because I am beginning to ponder that question now that I am relooking at the photos.  Or is there truth to the saying “reproducing like rabbits”?

So I hope you have enjoyed the SMALL tour  in the shop and inspires you to hop into a bunny theme project of your own.

Cottage Comfort

Miniatures can literally take you way from the cares of the world to a place time has slowed down.

Shrink down and come inside!

This morning’s weather has changed to a damp rain.

A pair of wellies by the door , the watercolor palette on the chair with binoculars are from this morning outing that ended when the damp rain began.

wellies-2
Wellies by the door
timid-mouse-2
A timid mouse is checking out the activities
chair
Chair with this morning’s paraphernalia

With the cold and damp setting in outside…

Hot tea, fresh bread and rustic cheeses more than make up for the dash inside.

tea-kettle-main
Ready to pour a cup
freah-bread
This morning’s bread
cheeses
A wonderful assortment of cheese to go with the bread and hot tea.

A lazy cat enjoys the warmth of the fire besides the favorite rocking chair.

hearth-1
Best spot in the cottage on a cold day!

Upstairs is a sled bed with lots of warm blankets to snuggle under.  I imagine the cat abandons the hearth with bedtime comes.

bed
Simple but elegant

The bed warmer is a recent find from a lot of copper things on ebay.  It added to the mood.  Imagine snuggling down is a toasty warm bed on a cold night after its use!

bedwarmer
Makes for an inviting bed when the weather is cold

The kitchen counter….

This turned out so good!  I do love aging and adding character to pieces.  Going from a blank canvas to this …. is a total artistic escape for me.

bare-sink
Bare beginnings
sink-2
A well loved sink with lots of use

If I could give you a step by step instructions of the transformation I would, but it is like asking Grandma how she does a recipe that she doesn’t measure — just makes it!  It leaves me perplexed by the inner workings of the mind that control the hands.  How does that happen?

My treasures collected over time have pulled together to breathe life into this cottage and given it a story!

The coolest butter mold with an imprint is from a box of junk.  No idea who made it but it is a cherished find. It sits on the counter by the fresh bread and butter dish.

A spot for the spice drawers – all which open.  I know it is silly but I love knowing that.  A wonderful rustic chicken print  from Dominque Autin. Every one of her pieces are simple but done so well they delight me each time I look at them.  The shelf sports a bottle of wine and special canned goods to be used for the arrival of someone special.

shelf-above-sink
Warm glow of candlelight
shelf-above-sink-2
Always ready for the unexpected guest
chicken-print
Rustic chicken print

The china in the shelves by the door are from my faux china painting days.  This cabinet and dishes was a class I taught long ago with a few added pieces to round it out by Vince Stapleton and Valeria Casson.

Oh the table! It is by Bradley Meinke.   If you get a chance to take one of his wood finishing classes — do it!  He is very sharing of his techniques.

The chairs are odd ducks picked up at the Denver show.  I love the faux bamboo look.  Quirky but adds to the cottage character.

tea-kettle-w-cheeses
Faux china in the corner and Bradley’s table

I had a friend over and she was checking out the cottage interior.  She said that one thing seemed out of place — the pipe on the mantle.  Obviously, its a woman’s cottage — so why the pipe?

Its a remembrance of a friend now gone.  A reminder of many an evening shared by the hearth and the stories shared but not forgotten.

hearth-closeup
A pipe to remember many a shared evening by the fire

For a bit of amusement — note the transformation of the skull candle into a normal warm candle.  Another one of Dominque’s pictures hides the wiring.

Now for the total view of the interior………

main-room-2
Kitchen area
total-view
The entire interior of the cottage

All in all … I can imagining walking through the cottage door and feeling instantly at home.

I hope you are feeling the same!

Transformation…

I had bought a half done project at a miniature show auction some time ago. It was a cottage from a Rik Pierce class. They are a lot of work but so beautiful when done. The structure was glorious but the exterior landscape had a swampy wetland with all kinds of creatures.

The beginning cottage

The previous owner’s intent was for a witch’s cottage. That was not an interest of mine. What to do with the poured resin swamp had me stumped. So it sat all this time waiting.

Changing the landscape

Finally, I started to play house inside the structure this summer and ignored the exterior. A plan of action developed. The fantasy of a place away from the busy world tucked away in a woods emerged. The cottage began to have a personality – I pulled out the barren tree (so much easier in miniature than real life!) and covered the swamp with paper clay to get a landscape to support flower beds. This then sat for several months without any further work. The reality of how many plants this involved overwhelmed me.

The dead tree is gone!


Not today – another day – was my response each time I started to think about it UNTIL an unexpected Christmas package arrived! My friend, Loretta Kasza had been talking about creating and making plants this fall but I hadn’t seen them. She sent me a batch of them!

I think my cottage had simply been waiting for them! They were just perfect! I wish had had photographed before planting but didn’t plan that far ahead. So here is a peak of them in the ground so to speak.

This slideshow requires JavaScript.

Flower beds emerged! Combined with my stash of plants collected over time, Loretta’s foliage plants and filler materials it became a lush cottage garden that I could envision enjoying living there in the cottage.

A fimo butterfly from Lola’s Originals (in a drawer far too long) now rests on a hydrangea flower. Two of Loretta’s spectacular variegated plants show off the hydrangea bush.  Then for fun, I added the dandelion growing in the rocks, it seems the gardener missed that one.  The dandelion is by my friend, Twilla McKee.  The corner became a composition with all the elements working together. I was thrilled!

corner-composition
A perfect corner!

Another butterfly sits on my prize rose bush ( I can grow them in miniature it seems versus reality it is not so pretty. Kansas weather is rather harsh on them here). Another plant from the drawer stash. Along with a cadmium made ages ago.  

rose-bush
Rose bush in full bloom

I even had some creatures to add to the garden. The path around the corner has a toad and a snail peaking out from the greenery. The lovely hosta is another of Loretta’s treasures.  Can you see the ladybugs added to the plant to keep the aphids away? They were another forgotten treasure from the drawer stash.

Loretta's hosta
the eye catch corner of the path as you approach the door

A pot of lavender on the bench by the door has a few more butterflies. Sitting beside it are a few vegetables harvested from the garden to add to the stew for supper tonight. The lavender is by Maryvonne Herholz. The bench is by R-stuff.

lavender-and-bench
the comforts of home
lavendar-closeup
a gathering of butterflies on a pot of lavender

No garden is complete without birds. A bird’s nest is tucked in on the porch roof and a chickadee is resting on a shutter momentarily add to the scene.

It all pulled together and became a magical place to wander off to when I need time away from dirty dishes, laundry, etc. . Don’t get me wrong, reality is fine  but an occasional daydream wandering about in a FINISHED setting gives me a perk of energy to return to the mundane chores of daily life.

Now for the tour of the garden that I have been hinting about….

side of the cottage
flowers and ferns abound in the side bed
the front of the cottage
a view of the garden in front of the cottage
a view of the front entrance
a resting spot in the garden
close up of the plantings
close up of the flower bed
door
you are invited to step inside…..

with the next posting….


A good night’s sleep

bed-alone
Cozy bed for my cottage.

I’ve been working on a cottage that needed a bed that made you want to crawl in and snuggle down.  It needed that cozy and warm look of a thick coverlet and extra blankets tucked at the bottom if more were necessary.  Ok, you have to shrink down first to fit but miniaturists have very active imaginations!

It turned out pretty good and fit the spot.

It was easier that I thought, so I thought I would roll back the blankets and share some tips if dressing a bed or working with fabric draping is in your future.

pulling-back
Rolling back the blankets for a closer look at construction.

I will admit that most of my success was the fabrics themselves but this gives you some ideas to keep in mind when picking fabric or thinking about bedding.

THE MATTRESS

I simply cut 3 pieces of foam and loosely sewing them together for a mattress.  It could be more or less foam depending on the foam thickness and your bed. Some people use a ceiling tile cut to size as a mattress for the ease of pinning the fabric draping.  For me the foam was handy and not so messy to cut.

mattress-foam-base
The foam mattress beginnings.

I covered the foam form with white cloth and sewing it shut.  It doesn’t have to be fancy– generally no one is inspecting underneath the covers in a dollhouse bed.

I have had this odd fabric (a polyester blend of some sort but has a very soft drape to it) for a long time.  Generally, cottons, silks, and other natural fabric are the best for mini work but there are exceptions.   A couple stripes of this fabric became the bed skirt (and no gathering needed!).  I glued the stripes to the mattress.  I folded the raw edges of the ends to the back at the foot and head of the bed.

draping-qualities
The bed skirt material.

I used the fabric fusion glue.  It is a clear gel like substance.  I am not sure I like it but it worked.  It left spots but it could have been me, it was white on white and I didn’t spread the glue out well.

fabric-glue
Fabric glue I used.

THE COVERLET

This fabric just looked right!  I draped one piece on the bed and decided to double it so it could be turned down and inviting to climb in for the night.

bed-skirt-and-coverlet
My fabrics for the bed.

I loosely folded under the sides to the back of the 2 pieces and sewed them together. I had only used ironing and steaming at this point.  The base is tucked in so no messing with that side.  The top is stitched down after the turned down part is in place.  This may seem odd but I think it allowed a better draping this way than sewing the two pieces entirely together, turning it right side out and then trying to get it to lay naturally.  It gets bulky and boxy.  This way the top and bottom pieces can move and set in position without being bound until it is laying on the bed the way you envisioned (or hoped) and then connected together.

Now that I have size and positioning figured out, I put the piece in a plastic bag with fabric stiffen liquid.  Dampen the piece until completely covered.  Remove it and drape it on the bed.  I used pins as needed but not too many (the pin holes will show when pins are removed later) to get the natural draped look of the coverlet.  Now is the hardest part for me.  To walk away and let it dry!  I kept wanting to adjust something but just have to give it time to dry.  So I worked on a matching pillow to keep my hands away from the drying fabrics.  Added a little touch of lace to the end to finish it off.  It looks comfort.

fabric-stiffening
The necessary magic for great draping of fabrics!

The fabric will be stiff as a board as the saying goes when it is completely dry.  Here is the photo to prove it!

stif-as-a-board
Stiff as a board!  Finished but not glued to bed yet.

I used more of the stiffening liquid for the blanket and throw at the base of the bed.  I did add a 2nd layer of white batiste to the cut up doily for a more solid look to it.  It needed to be delicate but still warm as a cover.

blanket-and-throw-beginnings
Materials for the blanket and coverlet.

Now the bed is complete and moved into the cottage.  No matter the weather, this bed has the look of a perfect place for a good night’s rest.

bed-in-place-closeup
Warm and inviting bed for the night!

bed-in-place
It is a snug little place but homey!


My China Overflows…..

Pretty dishes are the start of a great meal.  It announces that it is an occasion with good food and conversation to follow.  My love of beautiful dishes overflow from the dining table to the walls and shelves of my home. I enjoy the artwork of these treasures so it is no surprise that it spills over into my miniature world.

I actually painted and sold sets of Chrysnbon dishes many, many years ago before I discovered the laser.  So following a miniature whim this year, the dishes were calling. My goal this year is to explore and actual DO some of the things I have bookmarked on the web.

One pin of bunny plates had caught my eye many times while I was browsing on Pinterest.  They were actual tags that someone created for embellishing packages.  I reduced them to mini size and printed them.

Unfortunately, they were not that great in mini size.  When reduced the colors became muddy.  So I had to tweak them to bring the colors and graphics out.

comparsion-shot
Comparison of the graphic tweaking of the image

Oooh — that worked! I was excited and combined a bunny postcard graphic with the plate rim pattern for another style.   Another success!

bunny-love

Then the hunt was on for more dish images to shrink down for my mini china obsession.

worktable-of-dishes
A sampling of china ….the garden hose rubber washer, metal washer and button are my dish shaper from found objects at home.

china-sampling-3
I liked the red and blue combinations together.

I decided to make some cardstock dishes forms (these are a little larger than the Chrysbon sets) so they could be punched out with a paper punch for a perfect circle cut.  I used a 1 inch and a 3/4 in circle sizes due to the ease of available punches.

The cardstock blanks need to be shaped to look like a plate otherwise it doesn’t look real. My shaper isn’t fancy or perfect but I was experimenting with what I had laying around. It is in the bottom of the sampling photo.  The basics requirements of the shaper is to have some way to hold the cut out circle over a center hump to shape the paper so there is a rim.

I did come up with some improvements of this and have two shapers for 1 inch and 3/4 in circles available at my website (www.lisaslittlethings.com) but this can be done by other means as you can see. Sorry but I have closed the website and it is not available any longer. See the first photo of my homemade start for ideas of how to make a shaper from things at home.


shapers-both
Dish shapers for 1 inch and 3/4 inch cardstock circles

I shaped two cardstock blanks and glue them together so my dishes have a bit of body to them.  I then glued a dish image to this form.  I used a piece of parchment paper to protect the image as I rubbed the image down.  You don’t have to use parchment paper but if you have on hand it is helpful

Use a strip of double stick tape on a piece of mat board to hold the dishes stationary for the next couple of steps.  Color the rim edge with a color from the dish or get fancy with a gold edge.  Now the dish is ready for a coat of glossy varnish to get that that china look.  Apply the varnish with broad strokes with a very loaded brush so it is a thick coat but avoid the temptation to repeatedly go over the plate to smooth it out. You will work in air bubbles in your strokes doing this and makes it even messier than what you started with. If you have a few air bubbles – touch the bubble with a wet brush tip of water,  The water dissolves the bubble.  Allow the dish to dry and apply a second coat —now it looking like china!


gathering
An overflow of china……

Now comes the really fun part!!!!


Check out my youtube video for a visual tutorial and more in depth details on creating some wonderful china……….

an easy way to create dollhouse dishes

Here is the pdf file of dishes sized for Chrysnbon dish forms.

chrysnbon bunny plates GIVE away

Here are dishes for 1 inch and some for some 3/4 inch circles.

dishes for 1 inch circles give away 3

dishes for 75 in dishes give away

The original creator of the bunny plates/tags was gracious to allow me to share these with you…..here is her blog if you wish to visit her site also……….

original bunny tags

more pretty plates/tags

Here is another blog posting that will give you more china facts and her tutorial of miniature dish make too….

wonderful china info and mini tutorial too

Hopefully you will find this as fun as I did  and create some cherished china for your mini home.


Kid’s Play

It’s January and for the most of the United States it is really, really cold and misery outside.  Time to stay inside and find some place warm, for me that’s my workroom.

I’ve been tinkering again and cleaning out some bins of bits and pieces that time forgot. This year I am trying to make time to do some of the pins from Pinterest that I am always adding to.  I will never get to all of them but love the creative mood it creates for me as I am scrolling through the pictures.

Miniaturists do have a hard time tossing things.  I kept saving the candy/cough drop tins over time.  Now is the time to transform them into something.  One pin that catch my eye was the stovetop transformation.

So I decided to make some for grand kids and recycle some minis that were tired of being in a forgotten drawer. So the fun began!

Its a small surprise to send in the mail when the live far away.  A reminder that Grandma was thinking about them. I like to imagine their faces when it is opened. It is always a treat to have something come just for you in the mail, especially for kids!

Here is the pictures of one of them.

completed-project
Spaghetti and meatballs is what’s cooking!

Here is the graphics for the stove top that I mentioned in the video below.

Here is a video for further explanation. Hope you find this as entertaining as I did.

Playtime is always good for lifting your spirits on cold, cloudy winter days.

Little Delights to Share